April 2021

MusicTransferStudent

Teaching A Music Transfer Student!

Tip #6 – Teaching a music transfer student, someone that has taken lessons previously, is probably the most challenging of students for a music teacher. You don’t know what they know or, more importantly, what they don’t know, and they will compare you to the previous instructor. This tip will give you great insights into making a smooth transition for the transfer student and can apply to any instrument.

Be Prepared

Before the first lesson, ask the student or parent what curriculum they used or music they played with the previous instructor, as well as any notes the instructor had written. Take the time to read and become acquainted with the information they give you. Knowing their background will help you determine their skill level and style of the previous instructor. If possible, try and continue with their curriculum, especially at the beginning, to keep a smooth flow into your teaching.  

Establish a rapport with the music transfer student

The first lesson is the most critical and will set the tone. Start by getting to know the music transfer student and letting them get to know you. Spend a few minutes to let the student know your training background and experience. Then take a few minutes to ask the students questions about their past piano experience and what they are interested in learning. Knowing this will help you plan the best path for the lessons. It will also help the student be more comfortable and let them know you care about their interests and goals. 

The first lesson

Once you’ve made the student feel comfortable with you, have them play a piece that shows their highest level. Upon hearing them play, you can tell their strengths and weaknesses. Asking them specific questions about the piece they played is a good way to determine what they know and don’t know. 

Make Changes Slowly

You may be tempted to make multiple changes from the start, but be careful to present changes slowly and incrementally. They will need time to adjust to your teaching style and personality, and that alone may be overwhelming at the beginning. The most challenging changes are bad habits or wrong technique. Start with complementing the student on what they do well, then make changes one at a time. However, it is good to offer some information or changes in the first lesson to show them you can take them to the next level.  

Be Careful Commenting on the Previous Music Teacher

Whether the music transfer student had a positive or negative experience with the previous instructor, it’s essential to keep your comments at a minimum. Keep the focus on the direction between you and the student. Telling the student they were taught incorrectly may cause frustration and a sense of wasted time and money. It may also cause a division between you and the student. 

Not every student-teacher is a match for the music transfer student

Be realistic that you may not be the right instructor for all music transfer students since they may have specific interests you cannot fulfill. If that is the case, be honest with them. They will appreciate and respect you for your honesty. If you can, recommend another instructor who can teach their interests. If this happens, don’t be discouraged; there are plenty of other transfer students that will fit your teaching style and personality.  

It Gets Easier

While you may feel like you’ll be the “new” instructor forever, before long, you’ll be their new favorite! Just like any relationship, it takes time to establish. Be patient, and soon you’ll be the instructor they compare others to!

I hope this tip helps you be the BEST music teacher ever!

Melody Music Publishers

Kathi Kerr founded Melody Music Studios in 1989, a nationwide music instruction studio. In 2017, she founded an independent publishing company called Melody Music Publishers for piano and singing method books. The learning model is small steps using drills and repetition, how students think and learn.

Teaching A Music Transfer Student! Read More »

Sight-Read Sheet Music

Sight-Read Sheet Music

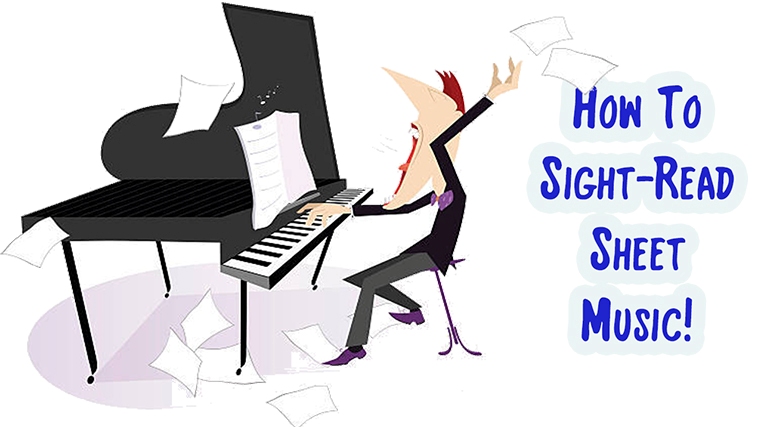
Tip #5 – Sight-reading sheet music on the piano or any instrument is technically reading “at sight,” or the ability to read fluently, without counting the notes.   Learning to read music can be as complex as learning a new language and takes time and repetition to master. However, in time it will pay off, and soon the student will read music as effortlessly as reading words! Here are steps in the process of sight-reading.

Knowing The Logic of the Written Music

The written music as we know it today began around the 9th century in Italy (which is, by the way, why the terms are in Italian). Imagine the task of writing down the music you hear? It has evolved over the centuries and looks different today than their original writings, but the “logic” of the notes are still the same, ascending and descending on the staff. Unfortunately, today’s students are taught mainly by acronyms like “Every Good Boy Does Fine.” This way of teaching the notes is ineffective for sight-reading sheet music in two ways: 1) it doesn’t show the staff’s logic, and 2) counting to identify the note is too slow to read fluently. If you teach your student the logic of the notes ascending/descending right from the beginning, they will remember them better.

A Small Number of Notes At a Time

Learning to read music can be overwhelming for a student, so it’s best to start with a small set of notes in order on the staff at a time. Repeatedly reading songs with the same set of notes will instill a visual memory of each note to create fluency. Our series “Drill & Excel On the Piano” takes five notes per chapter, with 20 songs using just those sets of notes. By the end of the chapter, the student can sight-read these notes with ease!

Rhythm in Sight-Reading

For many students, the rhythm is often the weakest part. However, if the rhythm is taught early on in the student’s training, they will play correctly automatically. I use rhythm drills at the start of lessons with a beginner, playing the rhythm without notation on one note while counting out loud. Repeatedly playing the rhythm creates fluency. For challenging rhythm in a song, you can have the student play the rhythm on a single note. Melody Music Publishers sells “Rhythm Workbook 1” and “Rhythm Workbook 2” for beginners to late intermediate. By the end of each book, a student can read the rhythm fluently!

Don’t Look At Your Hands

I’ve seen students look back and forth between the sheet music and their hands while playing. This way of playing creates two problems: 1) it stops the flow of reading, and 2) it hinders the student from remembering where the keys are and feeling the notes’ distance. On the other hand, when the student keeps their eyes on the music, it creates a smooth reading and a feel for the keys.  

Read Ahead

Another essential point to sight-reading is reading one beat to one measure ahead. As a “trick” question, I ask my students if they should “think” about the note they’re playing. If they say yes, I’ll say, nope, too late. You have to know the note before playing it, so reading ahead of your playing will ensure playing correctly and fluently.  

Interval Reading

Since music is a set of intervals, the distance from one note or set of notes to the next, identifying intervals by sight is another way to sight-read. This way of reading is called “interval reading.” The “Drill & Excel On the Piano” series has interval worksheets for the student to write the intervals without counting to know them at sight.  

Sight-Read Takes Drills and Repetition

Just like learning a new language, reading music fluently takes time and repetition. Many methods claim a student can read fluently in a short amount of time. That is not realistic. Letting the student know it will take time to be fluent will help them not to be frustrated. However, let them know that once they’re reading fluently, they can play a new song with ease, and reading music is no longer a chore but FUN!

These books are an excellent curriculum for home-schoolers too!

I hope this helps you be the best teacher ever!

Melody Music Publishers

Kathi Kerr founded Melody Music Studios in 1989, a nationwide music instruction studio. In 2017, she founded an independent publishing company called Melody Music Publishers for piano and singing method books. The learning model is small steps using drills and repetition, how students think and learn.

Sight-Read Sheet Music Read More »

How to Practice a Song on the Piano

Tip #4

In my previous blog, I talked about how to motivate a student to practice. Now I want to talk about HOW to practice a song on the piano. Practice doesn’t always make perfect, but perfect practice makes perfect. The amount of time doesn’t automatically mean improving. A lot can be done in a short amount of time if practicing correctly. Practicing incorrectly may do more harm than help.  

What Practicing is NOT

Playing a song from beginning to end is not a practice; that’s called a PERFORMANCE! Here are ways to practice a new song.

First Step

The student should begin each practice with exercises and warm-ups. Doing this helps to get their mind and fingers ready. For a new piece, let your student play it from beginning to end, mistakes and all, to get acquainted with the song.

Spot Practice on the Piano

After playing through the song, it’s time to spot practice the more challenging parts. It may be a few notes, a measure, or an entire line. 

1. Play notes without rhythm

If the notes are the problem, play them without rhythm or steady beat. The student can start with hands separate, especially the hand that may give them the most trouble. If the notes jump around, have the student play them without looking to “feel” the notes’ distance.

2. Play rhythm without notes

If the rhythm is challenging, have the student play the rhythm on one note and count out loud. This way of playing is what I call a rhythm drill. The student can start with hands separate and then both hands to learn how the rhythm lines up.

3. Alignment Practice

If the student plays hands separately well but can’t play them together, I suggest alignment practice. Have the student play the notes with both hands VERY slowly, with no rhythm or steady beat. Notice where the notes line up in each hand and how it feels to play them together. When the student can play the notes together, play with the rhythm at a very slow tempo. And finally, increase the tempo incrementally until it’s at the desired tempo.

4. Repeat section immediately until learned.

When the student plays the troubled spot correctly, have them immediately repeat it until it’s solid. The sooner the student repeats the area when it’s still fresh in their mind, the better the retention. Once it’s learned, have the student practice a measure before and after several times to ensure it’s smooth going into and out of the troubled area. The gauge to having learned the troubled areas is how they play it cold at the next practice. If the student makes the same mistakes, they will need to repeat the spot practicing steps.

5. Record the student

It may be difficult for the student to listen to themselves while playing, so recording the piece is an excellent way to critique it. Listening to the recording is much different from listening while playing. The student may want to circle the parts they may still need work on and then go back to spot practicing those areas.

Now Play the Entire Piece

Once the student has untangled the challenging areas, they can now play the song from beginning to end. When the student has played the notes and rhythm correctly, this is an excellent time to focus on dynamics and phrasing.

6. Final Practice on the Piano

The last step to finalizing a piece is to play it without stopping. If the student is unable to, they may need to go back to spot practicing certain areas. If the student will be performing the piece, a week or so before performing, have them play the piece without stopping, even playing through errors. Being able to play it all the way through without stopping will give the student confidence when performing.

I hope this tip helps you to be the best music teacher ever!

Melody Music Publishers

Kathi Kerr founded Melody Music Studios in 1989, a nationwide music instruction studio. In 2017, she founded an independent publishing company called Melody Music Publishers for piano and singing method books. The learning model is small steps using drills and repetition, how students think and learn.

How to Practice a Song on the Piano Read More »

Music Student

How To Motivate The Music Student to Practice

The second greatest challenge a private music teacher has after attendance is getting students to practice. However, your job isn’t to make a music student practice; it is to make them want to practice. When you look at it from this perspective, it may help change your approach. I’m not talking about an occasional week where the student was out of town or too busy to practice, but a student that perpetually doesn’t practice. The responsibility for the student’s motivation to practice comes primarily from you, the music instructor.

Does Brow Beating Work?

If a student has a track record of not practicing, your “browbeating” or “guilting” them into it is NOT going to work. All this does is make the student feel bad about the lessons and may cause them to quit. If a student tells me they haven’t practiced this week, I tell them it’s ok and focus on practicing more the following week. Your negative comments won’t change the past. So music and piano teachers, let’s stop doing this, ok?

But How Do You Motivate Them to Practice?

The first step in motivating a student to practice is finding out why they’re not practicing. This kind of thinking takes discernment on your part. Here are some possible reasons and solutions for a student’s lack of practice.

Problem: Too Busy

Being too busy is probably the biggest reason for a student not to practice or at least the biggest excuse. For children whose parents put them in so many programs and school functions, their (lack of) time is your biggest competitor, not only for practicing but also for getting music students. Adults have so many responsibilities that it’s difficult for them to put in the time to practice.  

Solution: Schedule Practices

Since a week can go by without practicing, having the student schedule a time to practice will help make it a routine. I suggest practicing before or after homework, school, or dinner for kids. Or practice at the same time as the lesson itself. For adults, it could be before or after work. Whatever time works the best when they’re fresh and have undistracted time. Also, tell the student to practice even if they only have 15 minutes sporadically. Multiple 15-minute practices can add up to sufficient time and are better for a beginner student.

Problem: Confused about What to Practice

I believe this could be why students do not practice, even though they may not admit to it. This reason may be the most challenging to discern. Some students will assume it’s their fault for not understanding and may not ask you questions. Others might be afraid to ask you questions if you had already explained it. Another reason a music student may not understand is a lack of clear and concise assignments. 

Solution: Ask a Lot Of Questions and Give Clear Assignments

The most important thing you can do as a music teacher is to let the student know they can ask ANYTHING of you, even if you had already explained it. Never let the student feel intimidated to ask you questions or feel they’re not smart enough to understand. I tell my music students I will explain something a million times if needed! And to make sure they understand, I always ask them questions after explaining a new concept. Also, make sure your assignments are written down and are clear and specific. After writing down the assignments, again ask them if they have any questions. Asking them questions will give you more insight into their thinking. And it sets the tone that questions are good, making them more at ease to ask you questions. 

Problem: Non-Realistic Goals

I’ve heard teachers (and parents) tell a beginning student to practice an hour a day. That’s unrealistic and will cause the student to fail ultimately. The discipline of practicing is something learned, just like learning the instrument itself. The beginning student not only doesn’t have the discipline, but they also don’t have enough information TO practice for that length of time.

Solution: Short Practices Done Often

For the beginning music student, the best way is multiple, short practices. For ages 4-8, I recommend 10-20 minutes at a time. This time frame doesn’t sound overwhelming to the beginning student. As the student progresses, the longer they can practice. The beginning of each practice is when the student is the freshest and gains the most improvement. I tell my students to start each practice with the most challenging parts.

Problem: Family or Personal Problems

Life is messy at times, and you may have a student going through family or personal problems. I don’t recommend asking personal questions since you’re there as a music instructor only. But what if their problems continue and hinder their practicing and learning?

Solution: Be a Good Listener

Without asking personal questions, you can ask the student how they’re doing. I usually start a lesson by asking how their week has been. By showing them you care may be enough to have them focus on the lesson. However, if the student is troubled, asking how they’re doing may help them open up. I don’t suggest giving your opinion on their situation, but sometimes listening is all that’s needed, and giving them your empathy. Giving them the gift of music may be the help they need and may encourage them to practice.  

Problem: Not Interested In Music

The lack of interest is the most challenging of all and may not have a solution since music is not everyone’s cup of tea. I once taught a little boy for one year. No matter how much I tried to make the lessons fun, he hated it. His mom was diligent in making him stick with it. However, after a year, I asked him if he liked to play the piano. He said no, of course. Then I asked if he liked the “sound” of the piano, and again he said no. That’s when I let his mom know after a year that I didn’t think it was in his DNA to play the piano.

However, I wouldn’t have suggested he stop after only a few months of lessons. A beginner’s first 6-12 months is the most challenging and can be the opposite of fun. It’s good to remind the student to give it time, and the better they get, the more fun it becomes. However, if a student is still not interested even at the intermediate level, there may be different approaches you can take before giving up.

Solution: Different Path

The late beginning to early intermediate music student is an excellent time to show them different styles or songs or ask what they’re interested in. You can add these to the regular assignments or change the entire lesson. Or, if your student has only played by reading music, you may want to change to by ear and improvisation, or vice versa.

A Final Note

Finally, I don’t tell my students to practice; instead, I give them assignments. During the lesson, they either pass or don’t pass them. I’ve noticed that students want to do well to pass, motivating them to practice. Their reward is my accolades when they’ve done well and get to move on to the next assignment. For the young student, I give points when passing each assignment or practicing five times in a given week, with a prize after so many points. You’ll be amazed at how the music student will have time to practice when there’s a prize involved!

I hope this tip helps you to be the best music teacher ever!

Melody Music Publishers

Kathi Kerr founded Melody Music Studios in 1989, a nationwide music instruction studio. In 2017, she founded an independent publishing company called Melody Music Publishers for piano and singing method books. The learning model is small steps using drills and repetition, how students think and learn.

How To Motivate The Music Student to Practice Read More »